
Frequently Asked Questions
There are several systems for you to choose from, each product section has a description of each system and its possible applications, consider whether you are using it for private or commercial use, the weight and approximate number of the pieces you will be hanging and the approximate length of the walls.
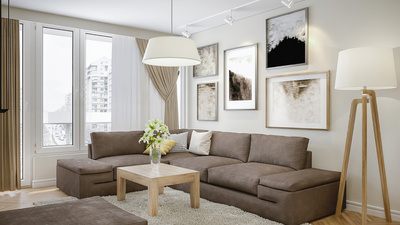
In most cases we suggest you continue the top rail over door frames and windows as the rail is designed to look as if it were part of the cornice. If you were to stop the rail at any point before the end of the wall ,we suggest using end caps on all ends to whether stopping at a doorway or abutting the corner or another rail.
For a complete system you will need the RAIL / RAIL CONNECTORS / END CAPS / CABLES / HOOKS . All RAILS come with all necessary wall mounts, screws and masonry plugs.
If you wish to connect rails at any point with The Minirail Systems you will need a RAIL CONNECTOR and END CAPS to finish the rails. (The Fortis Systems do not require rail connectors, they are simply butt joined by pushing the square cut end of the rail hard up to the next rail)
You will need CABLES to suspend the artwork from your rails, these can be either 10kg clear nylon cables or 25kg stainless steel cables in either silver , black or white. Then you will need HOOKS to go onto the cables, these start with our 4kg HM hook or 10kg HZ hook for the clear nylon or for steel cables there's a HQ 20kg hook or an HK 25kg hook.
For working out length of cables required. The bottom of the cable needs to come down to at least chest level, as this would usually be the lowest point at which you would place your hook. Remember that stainless steel and nylon cables can be coiled up and hidden behind the artwork or cut off if required.
There are two ways to measure how many rails you require. One is simply by ordering all of your system in one length of rail. Measure all your walls add together and divide by 1.8 if using 180cm rails or divide by 2 if using 200cm rails. When doing this add 10% to the total, otherwise on the last section of wall you'll be fixing a long line of short off cuts together.
The preferred method is take each wall as a separate section. With the Minirail System for example the rails come in 120cm / 180cm / 200cm / 300cm lengths. An example, if you have a 4.2 metre wall and a 3.8 metre wall , order 1 x 2.0m +1 x 3.0m then carry the 0.8 off-cut onto the 3.8 m wall. Its best to write down all your measurements first and then work out where to use your off cuts, this minimises waste and cost.
Recommended method : Easier still, if you'd like to just email us with your wall measurements we can calculate everything including connectors and end caps and send you a quote. We've been doing this for years and that way you will know you have everything required.
We recommend using two cables and hooks per picture, so estimate the likely number of pictures you'll be displaying at any one time and multiply by two. Our cables and hooks are always readily available by Express Post so you can always order a few more if you need to. There is no minimum order or restrictions as everything is available individually or in packs of 10. If you're unsure of the amount of artwork you'll be hanging then one cable and hook per lineal metre of rail is a good starting point.
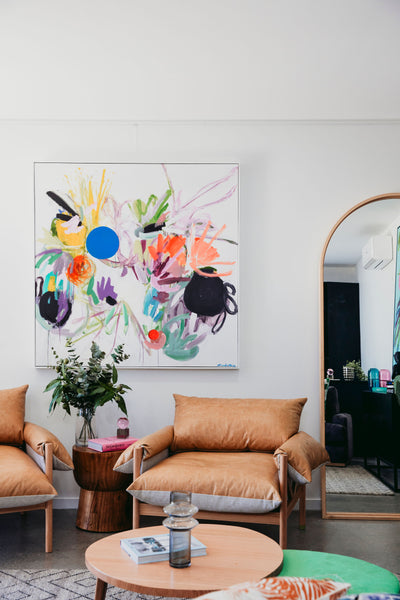
You may wish to hang multiple pieces on the same pair of cables, one above the other as the picture below shows so in that case calculate two extra hooks per picture, in this example the customer has used the Minirail System with LNC2 Clear Nylon 200cm cables and 4kg HM Clip hooks.
For all of our hanging systems we use the terms ''RAIL'' , ''CABLE'', and ''HOOK''. These describe the main features that make up each system.
The RAIL , is simply the picture rail, which is fixed horizontally at, or near the top of the wall under the cornice or square set join with The Minirail System or the Fortis Wall System and fixed to the ceiling with The Fortis Ceiling System.
The CABLE is the vertical piece that hangs from the RAIL, either a stainless steel cable or a clear nylon cable, easily adjusted from side to side once inserted into the RAIL.
The HOOK. All of our hooks are easily adjustable up or down on the CABLE, and all hooks are self-locking , so you can position your pictures perfectly and adjust heights and levels easily.
The Minirail System rail and The Fortis Ceiling Rail have a maximum weight capacity of 25kgs per lineal metre. The Fortis Wall System has a maximum weight of 45kgs per lineal metre. Cable weights are: 10kgs per nylon cable, 25kgs per steel cable, the hooks have various maximum weight ratings from 4kgs to 25kgs.
When using two hangers and two hooks for one picture (recommended for stability and particularly larger pieces) you can double the maximum weight capacity i.e 2 x 4kg HM hooks will hold an 8kg picture, 2 x HQ 20kg hooks will hold 40kgs etc.
The skill level required is similar to that of putting a row of shelves or similar home handyperson ability.
1. Decide at which position you would like the rail.
If there is a cornice then tight up against that is ideal; the rail is then barely visible from the floor height appearing as part of the cornice once installed.
With square set ceilings without a cornice we recommend using an impact driver with a long drill bit extension, that way you dont have the spinning chuck of the drill near the ceiling and you can angle the driver slightly away from the ceiling when both drilling your holes and fixing your screws and wall mounts.
We are always happy to talk you through installation over the phone and provide easy to follow installation instructions with each order.
3. For the Minirail System figure out at which height you wish to install, the very top of the wall is best. If you are going hard up the ceiling or a cornice then use a 4-6mm thick batten or similar spacer to scribe a line all the way along the length of wall.
Masonry / brick walls - Mark your drill holes 100mm in at each end then 450mm apart (maximum recommended wall mount distance is 500mm apart) Use a 5.5mm or 6mm SDS or masonry drill bit and the 6mm masonry plugs provided. In older homes with soft bricks and plaster use over size plugs. For example use our provided 6mm plugs in a 5.5mm hole to ensure a tighter fit so taht your plugs wont spin in the wall.
Plasterboard / stud walls - use a stud finder to locate and mark your studs, if they are 450-500mm apart simply mark and drill into the studs. If your studs are 600mm apart or further mark and drill into the stud and then use a plasterboard fixing halfway between each stud to support the rail.
Figure out where your joins will be and support that join with a wall mount 100mm on one side.
Safety tip: For hard plastered walls, scan for electrical wiring before drilling, a standard stud finder will have this capability. Do a visual check, generally wiring should run 90 degrees from any GPO power point or light switch, scan directly above any switch and follow the sensor to see where the active power leads up the wall.
Drill your holes and insert wall plugs, push the screw through wall mount washer narrow side facing out and tighten screw to wall just enough so the back of the mount doesn't break the wall surface or start to compress the wall mount. Put all mounts on for the full length of the wall. Push an end cap into the end of the rail and a connector on the first rail making sure half the connector protrudes by half. Hold the rail in position over the wall mount at an angle and gently tap it with a rubber or timber mallet, a small hammer and wooden block will also suffice. Connect the second rail at the join end first, if you need to remove the rail to reposition slide a small flat screwdriver behind it at one end and twist then gently lever it off.
In most cases we recommend you use 2 hangers per single picture or vertical row of pictures and 2 hooks per picture. This will hold the picture straight and keep the whole display neat and level. However if the picture is portrait in shape, longer than wider and fairly light then one hook and cable can be used hanging centrally on the picture wire.
In a vertical display, if you use one hanger for a vertical row of small pictures the hanger will act as a pivot for the top pictures caused by the weight of the bottom one pulling away. Its best in this case to use two cables and two hooks per picture , with small artworks and photos use our HM 4kg hooks.
The excess of the hanger should be coiled up and tucked behind the picture, this way you are able to re-use the hangers when you change the display.
We have hung clocks successfully on the our systems before however there are a few things to consider: The centre of gravity on clocks due to depth versus height and the glass adding weight in the front can make the clock lean forward, the best thing to do as all clocks vary so much is to try it and see.